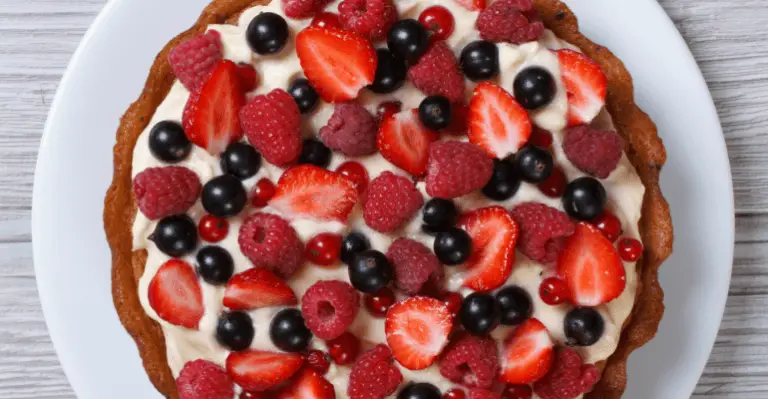
“Triple-Berry Tart” is a vibrant and refreshing dessert perfect for summer. This delightful tart features a combination of three types of berries – commonly strawberries, blueberries, and raspberries – which not only provide a burst of sweet and slightly tart flavors but also create an appealing mix of red, blue, and purple hues. The berries are typically arranged atop a crisp, buttery pastry crust, and may be set in a light, sweet custard or cream cheese filling. Some variations include a glaze over the berries for added shine and sweetness. The tart’s balance of the flaky crust, creamy filling, and fresh, juicy berries makes it a favorite for warm-weather picnics, barbecues, or as an elegant dessert at dinner parties. It’s often enjoyed with a dollop of whipped cream or a scoop of vanilla ice cream.
Ingredients
Tart Crust
1 1/2 cup (200 g) Gold Medal all-purpose flour
1/2 cup (50 g) Domino powdered sugar
1/8 teaspoon Morton salt
1/2 cup plus 2 Tbsp (10 Tbsp or 140 g) Kerrygold unsalted butter, very-cold, cut into 1/2 inch cubes
1 egg, lightly beaten with a fork
1/4 teaspoon McCormick vanilla extract
Filling
1 cup (8 oz) mascarpone cheese
1/4 cup (60 ml) cold heavy cream
1/3 cup (43 g) powdered sugar
1 teaspoon orange or lemon zest
1/2 teaspoon vanilla extract
3 oz (85 g) raspberries
8 oz (225 g) blueberries
8 oz (225 g) strawberries – stems removed and halved or quartered
4 Tbsp (60 ml) apricot jelly or orange marmalade
2 Tbsp water
1 teaspoon red wine vinegar or lemon juice
Equipment needed: Food processor, a 10-inch wide, 1-inch high fluted tart pan with a removable bottom
Instructions
1 Make the tart dough: In a food processor, add the flour, powdered sugar, and salt. Pulse a couple times to combine.
Add the cubed cold butter and pulse several more times until the largest piece of butter is the size of a pea.
Add the egg and vanilla extract. Pulse a few more times until the dough begins to form clumps and pull away from the side of the food processor.
2 Press dough into tart pan and freeze: Lightly grease the inside of a tart pan (with removable bottom) with butter.
Dump the clumpy dough into the tart pan and spread out evenly with your fingers along the bottom and up the sides of the tart shell. You don’t have to press too hard, if the dough is still a little crumbly, that’s good.
To make the top even you can press the dough up a little higher than the tart pan top, and then use a rolling pin over the top to even the edges.
Put the tart pan in the freezer for 1 hour.
3 Pre-bake the crust: Preheat oven to 375°F. Line the frozen tart crust with aluminum foil, with enough extra foil off the two of the sides to use for lifting.
Fill with pie weights—dry beans, ceramic or stainless pie weights. Place a shallow baking pan on the bottom rung of the oven to catch drippings.
Put the tart pan in the oven on the middle rack. Bake for 20 minutes. Remove from oven and remove the pie weights. (I lift the hot beans out by holding on to the aluminum foil and place the foil and beans into a large bowl to cool before storing.)
Poke the bottom of the crust with the tines of a fork. Return the tart pan to the oven for 10-15 more minutes. Bake until golden brown. Remove from oven and let cool completely.
4 Beat the mascarpone, cream, powdered sugar, zest, vanilla, then spread into tart crust: Using an electric mixer, beat together the mascarpone, cream, powdered sugar, orange zest and vanilla extract on high speed until stiff peaks form, about 40 seconds to a minute.
Scoop mixture into tart crust, and spread it so that it is level.
5 Arrange berries on top, brush with jelly mixture: Arrange the berries on top of the mascarpone mixture in the tart crust.
Combine apricot jelly (or marmalade), water, and vinegar into a small saucepan and heat on medium heat until bubbly and the jelly has dissolved as well as it can.
Using a pastry brush, brush the jelly mixture over the berries for a glossy sheen.
Remove the rim of the tart pan before serving. (You may need to use a knife to gently separate the edges of the tart from the pan.)


